Monday, March 28, 2016

Weird or Cute Gudetama?


I'm undecided.  Still not absolutely sure if I'm more disturbed or charmed by the idea of a depressed egg yolk as one of Sanrio's latest characters.

If you haven't encountered him before, Gudetama (roughly translates to 'Lazy Egg') is a depressed egg yolk.  He's yummy and full of nutrients but he thinks life as an egg is futile, because it's inevitable that he'll end up being someone's dinner.  So he lazes around in a permanent state of pathetic 'meh'.

Now I'm a MASSIVE Sanrio fan. I grew up with countless Hello Kitties around me so I've always connected Sanrio to child-friendly, OTT cute designs.  Picture my 'WTF' face therefore when I watched a Gudetama cartoon, where an egg yolk with buttocks complains of having a shell stuck in his arse and a man in an egg yolk leotard costume dances a routine to a theme tune sung by kids (don't believe me? Watch it yourself!).


Sightly violated was my first reaction.  Morbid fascination my second.  Then it was an appreciation that Gudetama is "Kimokawaii", the Japanese Gross-Cute trend (usually skulls or severed body parts with a cute face). Now?  I'm not quite sure.  I did think 'OMG cute!' when I saw a plushie of Gudetama lying on his egg white trying to sleep with a piece of bacon as his blanket.  But I'm not sure I've gotten over the man in the yellow leotard yet...

While you make up your mind, here's an amigurumi pattern to make Gudetama-under-bacon which is definitely more cute than gross.  Enjoy!

Gudetama under Bacon Blanket


What you’ll need:
You can use any type of yarn you like since slight variation in size won’t matter.  I used a very soft acrylic yarn similar to a 4ply. The yarn manufacturer's hook size recommendation is 3.5 but I used a 2.5mm hook for a tighter finish.  I always use a smaller hook than recommended for amigurumis to make my work tighter to better keep in the filling.  

Here’s what I worked with:

  • -          Yellow, white and dull red yarn (gauge 22sts x 28rows for 10cm swatch)  
  • -          2.5mm crochet hook; 
  • -          Black and white felt;
  • -          Tapestry needle;
  • -          Polyester filling; and
  • -         Permanent black marker.

Abbreviations:
ch                    chain stitch
sl st                  slip stitch
sc                     single crochet
sc inc               single crochet increase, i.e. work 2 single crochets into the same stitch
sc dec              single crochet decrease, i.e. crochet 2 stitches together
st                     stitche(s)

( )                     numbers in brackets denote total stitches for that row
*                      when a stitch pattern is repeated several times, it is enclosed by asterisks.  E.g. *2sc, sc dec* x2 - means single crochet twice, decrease, single crochet twice, decrease.

The body, legs and egg white are worked in joined rounds, so remember to start those pieces with a ch st at the beginning of every row AND end each row by joining the ends with a sl st.

Body: (in yellow)
R1: Magic ring, 5sc into ring, tighten ring, join round with sl st. (5) [If you find magic ring difficult or a hassle to do, just make a slip knot and ch2] 
R2: *sc inc* x5 (10)
R3: *sc, sc inc* x5 (15)
R4: *2sc, sc inc* x5 (20)
R5: *3sc, sc inc* x5 (25) 
R6 to R11: 25sc (25)
R12: *3sc, sc dec* x5 (20)
R13: *2sc, sc dec* x5 (15)
[stuff yolk with polyester filling at this point before the hole closes up]
R14: *sc, sc dec* x5 (10)
R15: *sc dec* x5 (5), end and leave a long yarn tail for sewing the 'bum'. See vid tutorial below:


Arms x2: (in yellow)
R1: 6ch (6)
R2: Starting from 2nd chain from hook 5 sl sts, end and leave a long yarn tail to sew arms to body.


Legs x2: (in yellow)
R1: Magic ring, 4sc into ring, tighten ring, join round with sl st. (4)
R2: 4sc (4), end and leave a long yarn tail to sew legs to body. 

Bacon: (in red)
R1: 17ch (17)
R2: Starting from 2nd chain from hook, 16sc, chain 1 then turn (to work on reverse side) (16)


R3 to R4: 16sc, chain 1 and turn (16)
R5: 16sc, [using white yarn] chain 1 and turn (16)


R6: 16sc, end and leave a short yarn tail. 
Using white, do two lines of slip stitches on top of the bacon between rows 1 and 2, and rows 3 and 4.


Egg white: (in white)
R1: Magic ring, 6sc into ring, remember to join with sl st (6)
R2: *sc inc* x6 (12)
R3: *sc, sc inc* x6 (18)
R4: *2sc, sc inc* x6 (24)
R5: *3sc, sc inc* x6 (30) 
R6: 1sc, sc inc, *4sc, sc inc* x5, 3sc (36)
R7: 3sc, sc inc, *5sc, sc inc* x5, 2sc (42), end and leave a long yarn tail to sew yolk and bacon onto egg white. 

Making up:
[Using a darning needle, follow the instructions below.  When you finish sewing, weave the yarn tail into your work a few time to secure then cut off.]

1. Sew arms onto sides of egg yolk, between rows 7 and 8. 
2. Sew legs onto egg yolk, over rows 13 and 14, at the front of yolk. 
3. Weave in yarn tail from egg white stitch by stitch towards the centre, then sew egg yolk onto egg white, aiming for his head to be near the edge of the plate and his bum just over the centre.  Use same yarn tail to sew bacon onto yolk.  

Eyes and mouth: 
Using black felt, cut two tiny ovals for Gudetama's eyes.  I've found them best positioned over rows 6 and 7, slanted downwards at the outer corners.  
Using white felt cut a bigger oval and using black permanent marker, rim edge in black.  Glue over rows 7 and 8.  The best glues for this are UHU or E6000.  

Tip: You may find cutting such small bits of felt difficult.  It will help to use a super sharp pair of scissors, e.g. sharp nail scissors for very well.  If it's still too difficult, try dabbing clear nail varnish onto the felt.  This stiffens the felt and allows better control.  


Wednesday, March 23, 2016

Free sewing lessons continued - Woodland Animals!

My absolute favourite animal of ALL time has to be the sloth.  Who doesn't like cute and lazy?   Whenever I get half an excuse I'll include a sloth just for fun.  So for the second set of free workshops in collaboration with the Singapore National Library Board, we'll me making these hanging sloth pins.


Aren't they cute?  When worn they'll look like they're hanging off the safety pin on wearer's lapel. Kinda like they were too lazy to move so decided to hang around for kicks.  A major plus (since there will be young crafters at the sessions) is how simple they are to make.  The little face is a bit fiddly but other than that they're just 5 shapes plus features.  Really looking forward to see how they'll fare in April.  Maybe I'll turn some of my students into crazed sloth fans!

Since it's a woodland theme I can't not include a bear! I found Benjamin Rowling's fabulous book "Cute Felt Bears" in the library and really liked the idea of a bear shaped cushion with a protruding head.


So I created a single layer bear body and added a squarish head (inspired by the bear on my daughter's play tent).  Add on black snap button for eyes and voila - bear.


I've kept the shape as simple as possible to make him achievable within the sewing sesison but I really like the way he's turned out.  The simple lines have the advantage of making him the BEST MODEL EVER for accessories! Somehow his face was just the right size for my son's quiet book pieces so I gave the bear glasses, a bow tie, a pirate eye patch and I crocheted a red scarf for him because red is so this season's colour :)

To finish off the trio I wanted to include a rabbit for Easter.  I wanted some functionality as well so I made her into a card holder.


The pocket is made with see-through plastic (using plastic table cloth material actually) so when your train card/bus pass etc is inserted, it looks like the bunny is hugging the card for safe keeping.

If they sound like your cup of tea then please join me this April 9th, 16th and 23rd at Bukit Merah Public Library and take a stroll through the woodlands via a sewing needle.  Again, my classes with the NLB are TOTALLY FREE - all you have to do is register.  Go to www.nlb.gov.sg/golibrary and search for threaded tales - woodland animals.  Hope to see you soon!

Monday, June 15, 2015

Evie's Quiet Book - Finished!!

Here it is! Evie's quiet book as played by me :) More detailed photos after the video. I improvised for most of the pages but I did painstakingly trace and draw out the Hello Kitty dress-up page so if anyone's interested, just leave a comment and I'll attach the template with brief instructions in a later post.  Enjoy!


Front Page with hand sewn yoyos and Evie's name embroidered on the tiny quiet book:

Front page
The bugs and animals hind-and-seek page.  I've sewn a pin onto owl since he's Evie's favourite, so she can wear him on her clothes which she insists on doing every time she plays with the book.

The bugs hide-and-seek page


The colour sorting page.  Evie can't read yet but she figured out exactly where to put each flower straight away by looking at the colour of the labels. 


The velcro apples and oranges page. Check out the cute tail on that bunny. 


Tiny worm on the orchard page
Laundry room page. With removable clothes and working hinge on the door. 


The Hello Kitty dress-up page. It's possible to do this page without sewing. I cut and glued most of this using my own template I traced out of Evie's Hello Kitty picture book.


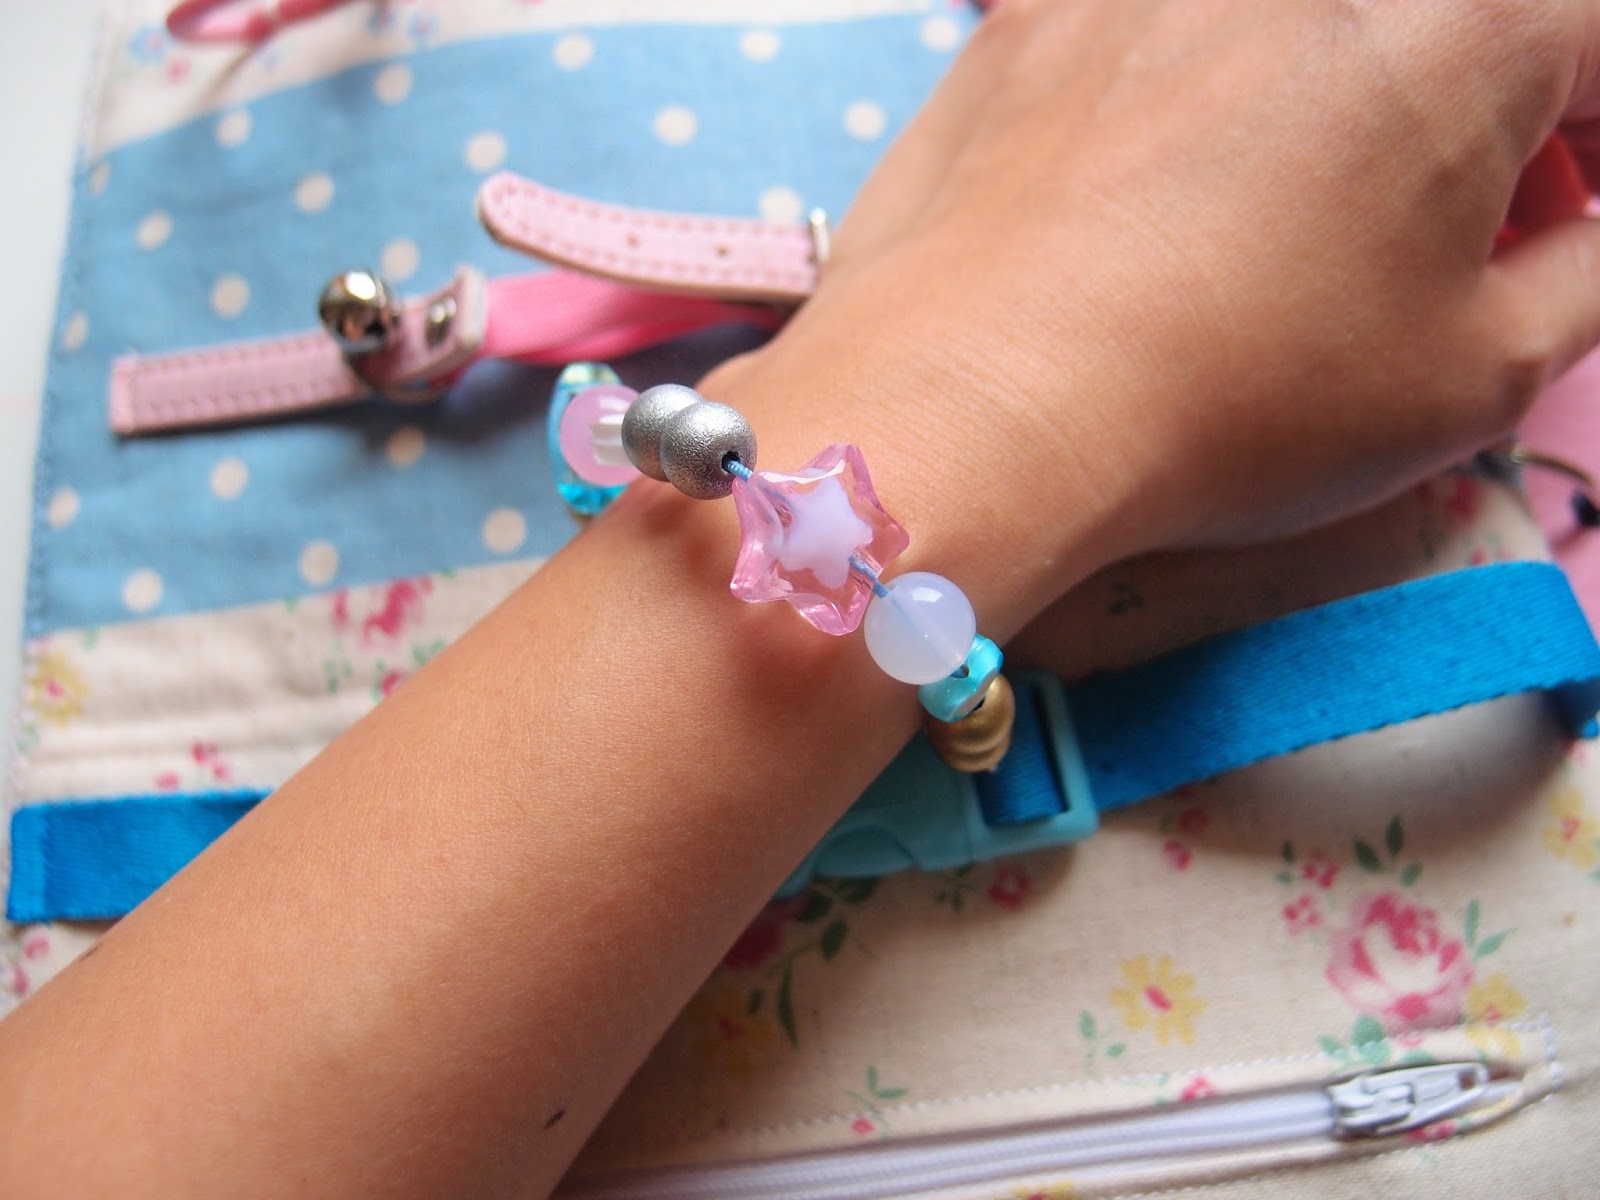
The string of beads on the belt and buckle page can be completely removed and worn as a bracelet.  


Evie's favourite things (after mummy of course).


Monday, June 8, 2015

Is felt the best material to use for quiet books?


My front cover for Evie's Quiet Book
I am utterly and completely addicted.  After a friend posted Greendot's video of her gorgeous quiet book, I've spent every children-asleep moment surfing Pinterest for quiet book page ideas. It wasn't clear to me why everyone chose to use felt though. Felts are cheap, flimsy things that tear and fall apart after a few days right?
Wrong! So wrong!
That may have been the case with the felts I played with as a child but what people have been using are high quality composite felts, made from wool or recycled plastics. After some experimentation, I've come to the conclusion that yes, felt IS the best material for quiet books, hands down. Here are the reasons why:

Economy


Samples from National Nonwoven 

Felts are relatively cheap and readily available.  This is especially so if you live in the US, where the best wool blend felts are manufactured. I ordered a bunch of National Nonwovens felts online and the quality is just beautiful. They are also helpfully sold in pieces of 9" x 12" so I only have to trim them to get the perfect quiet book page size.


It's a bit trickier to get your hands on wool felt in Singapore (where I live). Shipping from the US can be costly, but the craft shop Art Friend sells a pretty good alternative called Eco Felt, made from recycled "post-consumer plastic bottles". These are environmentally friendly and most importantly, super cheap (approx. 0.75 cents per 9"x 12" sheet). They are nowhere near as dense nor as pretty as wool felt but are absolutely good enough to use as backgrounds or non mobile pieces.

And for those who are trying quiet books for the first time and don't want to invest too much time or money, acrylic felt is a perfectly good choice. They are super cheap, come in a huge range of colours and can be found pretty much everywhere. I bought a bunch from our local S$2 store Daiso. Your finished work won't last very long it's true, especially if you're handing it over to a toddler. But then again if you mess up, throwing the whole thing out won't feel so painful.

If you're interested in the differences between eco, wool, wool blend and acrylic felts, check out this post by American Felt and Craft - The Blog, which does a really clear comparison.

Ease of use 


The most magical property of felt for me is they DO NOT FRAY! No need to hem edges, fold them over before sewing or allow seam allowance etc. This is SO convenient for making small animals and other bits to play with on the page. It makes designing easier too by eliminating difficult construction.

Felts are also very forgiving to sew.  Because they stretch, even if you've sewn a piece slightly wonky, it won't be very obvious. It is much easier to spray mount your felt pieces before sewing them on the background but for small to medium peices I've managed to get away with skipping that part.

Finally, felt makes the perfect background because it is relatively stiff without being brittle. If you sew on both sides, you will be using 2 sheets anyway and I think that is the ideal thickness. Any thinner the page will be floppy and any thicker will be difficult to sew under the machine.

Ready-made embellishments available


I was losing the will to live by letter G when cutting tiny alphabets for my son's A to Z page. Luckily, ready-made felt letters, numbers, and embellishments like leaves, butterflies, hearts, flowers etc... can be found from craft shops and online and they are generally inexpensive. Do yourself a favor, put down those scissors and that half finished G, just buy the 26 letters and save yourself a heap of trouble.

No Sew Option* 


Best glue in the world! 
I bet the best reason for those who can't or plain hate sewing is the no sew option! Again, because felts don't fray, you can get away with not sewing anything at all and just stick the felt onto the background with glue. You must however use a very good glue (I use E6000 which is the best glue in the world), otherwise the book will disintegrate - but I have had very good experiences so far, none of my no sew felt animals have fallen apart yet.

The velcro wasn't strictly necessary but I thought it looked cute. 

Also, because felt pieces are fuzzy and naturally stick together, there is no dire need to sew on velcro, snaps or buttons unless your design calls for it. This is THE best reason to use felt for your dress-up doll pages.
* (check out this fab tutorial by Nicolette for a no sew quiet book)

Appearance


My soft felt background held up better than my stiffened felt page
Now I've seen a few quiet books made from fabric that look awfully cute. However, there's just something super adorable with the fuzzy, hairy, squishy look felt has that other materials can't beat. It is also this thick fuzziness that makes felt an ideal material to use as background because it keeps the pages surprisingly flat.

Crinkle becomes more obvious over time
Do not make the mistake I made and use stiffened felt for the cover pages thinking they'd hold up better. They don't. Every crease and fold shows up like a beacon whereas the soft felt manages to level out by sheer fuzziness.

It does look good though to cover a few pages with fabric for variety. Especially if the opposite page is a bit plain or has a neutral palette. I used a really pretty flowery fabric as background for my washing machine page but it took a lot more effort and I still had to use felt as a backing regardless.  


More Pros than Cons...

There are of course problems with using felts too. Firstly, it is difficult to find patterned felt.  Solid colours and maybe a few polka dots are the snazziest you can get. Secondly, felts WILL break under ungallant hands. If you have a toddler who likes to explore your work by pulling them apart, your stuff WILL break. An easy way to avoid this is to steer away from very fine details in your design. Thirdly, unlike a fabric book, you can't wash the whole thing by dunking it into the washing machine if food/ dirt/ baby detritus gets onto it.

Overall, for me anyway I think the pros out weight the cons. Very happy to hear from anyone who've had more success with fabric though! Drop me a comment if I've missed anything out!
  

Friday, April 10, 2015

Mini Crochet Elmo - free crochet / amigurumi pattern


There’s a boutique café next to my son’s nursery where I go to hide from my kids. 

All I do whilst playing truant is crochet, create patterns, write patterns, test out those patterns, and dream up new patterns.  Plus I get peanut butter toast and lemon tea.  It’s heaven.

On one of those days, the café owner Mark told me he was planning surprises for his wife’s birthday and their wedding anniversary.  He asked me if I could crochet a tiny Elmo key ring for him, as his wife is a huge Elmo fan. 

"But Dorothy I swear! I didn't know Sushi was made of fish!"

“Sure”, I said, “I’ll give it a go”.  Not having seen much of Sesame Street for like – decades – I did some research on YouTube, which took me to some pretty inappropriate stuff… But anyway, I didn’t think Elmo or his friend Dorothy the goldfish would be that hard to do.  The slight challenges were the limbs which had to be 2D in view of the size.

Here’s what I came up with, pattern is included below for other Elmo fans courtesy of Mark’s romantic gesture.  I figured cookie monster and accompanying cookie might be possible with minimal adaptations.  Tips on how on subsequent blog post.


What you’ll need:
You can pretty much use any type of yarn you like since slight variation in size won’t matter.  I used a light weight yarn (that suggested a 3.5mm crochet hook) and a 2.5mm hook for a mini Elmo that measures 8cm tall.  I find it easier to think about yarn weight and size according to hook size.  I.e. If you use a yarn that suggests a 4mm hook then your Elmo will finish bigger than 8cm.

Here’s what I worked with:
  • -          Red and orange yarn (gauge 22sts x 28rows for 10cm swatch);
  • -          Super thin black yarn (or black embroidery floss);  
  • -          Crochet hook 2.5mm;
  • -          2x white pom poms (0.5mm);
  • -          Black felt;
  • -          Black/grey embroidery floss;
  • -          Tapestry needle;
  • -          Polyester filling; and
  • -          A key ring.

Abbreviations:
ch                    chain stitch
sl st                  slip stitch
sc                     single crochet
sc inc               single crochet increase, i.e. work 2 single crochets into the same stitch
sc dec              single crochet decrease, i.e. crochet 2 stitches together
dc                    double crochet (yarn over hook once before inserting hook, then pull yarn through 2                             loops at a time, twice)
dc inc              double crochet increase, i.e. work 2 double crochet stitches into the same stitch
dc dec             double crochet decrease, i.e. double crochet 2 stitches together
hdc                  half double crochet (yarn over once, pull yarn through the loops once)
st                     stitche(s)

( )                     numbers in brackets denote total stitches for that row
*                      when a stitch pattern is repeated several times, it is enclosed by asterisks.
                        E.g. *2sc, sc dec* x2 - means single crochet twice, decrease, single crochet
                        twice, decrease.


Head: (in red)

R1: magic ring, ch, 6sc into ring, tighten ring, join round with sl st. (6) [remember to start with a ch st at the beginning of every row AND end each row with a sl st into the first st to end for the rest of the pattern]

R2: *sc inc* x6 (12)

R3: *sc, sc inc* x6 (18)

R4: *2sc, sc inc* x6 (24)

R5 to R7: 24sc (24)

R8: *3sc, sc dec* x4, 4sc (20)

R9: *2sc, sc dec* x5 (15)

R10: *sc, sc dec* x5 (10), end leaving a yarn tail at least 8cm long.


Body: (in red)

R1: 8ch (8)

R2: starting at 2nd ch from hook, work 7sc, sc inc, 5sc, sc inc, sl st to join round. [remember to start with a ch st at the beginning of every row AND end each row with a sl st into the first st to end for the rest of the pattern] (16)

R3: 16sc into backloops only (16)

R4 to R5: 16sc (16)

R6: *3sc, sc dec* x3, sc (13)

R7: 13sc (13)

R8: *3sc, sc dec* x2, 3sc (11), end leaving a short yarn tail to weave into body.


Arms: (make 2 in red)

R1: 8ch (8)

R2: starting at 2nd ch from hook, 7sc [this forms the arm] (7)

R3: *3ch, then beginning at 2nd ch from hook, do 2 sl sts [this forms a finger], attach finger to palm by doing a sl st into the last st of R2* repeat three times to make four fingers, end one arm by leaving a short yarn tail and weave end into arm, end the other arm with a 15cm yarn tail to weave into arm and attach both arms to the body.


Legs: (make 2 in red)

Left Foot:

R1: 12ch (12)

R2: starting at 3rd stitch from hook, 3dc, 2ch 6sc, sc inc, working back towards the foot, 7sl sts, end leaving a long enough yarn tail to weave into leg.

Right Foot:

R1: 11ch (12)

R2: starting at 2nd ch from hook, 7sc, 2ch, 3dc, 2ch, 10 sl sts along starting ch sts, end leaving a 15cm yarn tail for attaching both legs to the body.


Smile: (in black)

R1: using super thin black yarn, 7ch, starting at 2nd ch from hook, sc, hdc, 2dc, hdc, sc, ch, sl st into starting ch, end leaving a long enough yarn tail to attach smile to face.


Nose: (in orange)

R1: magic ring, 4sc into ring (4)

R2: *sc, sc inc* x2 (6)

R3: *sc dec* x3 (3), end leaving a long enough yarn tail to attach nose to face.


Dorothy the goldfish: (in orange)

R1: magic ring, 1ch, 4sc into ring, sl st into first st to end. (4)

R2: *sc, sc inc* x2 (6)

R3: *sc, sc inc* x3 (9)

R4: *sc, sc dec* x3 (6)

R5: *sc dec* x3 (3), end of body.

R6: [make tail] 3ch, dc into end of body, *ch, sc dec* x2, 3ch, sl st into body, weave in yarn tail to end.  Sew on features with black embroidery thread on both sides to finish.


Making up:  

Stuff head and body before attaching head to body with yarn tail.  Sew arms onto body with the extra long yarn tail from one arm.  Sew right leg onto body, then using the same yarn tail, attach left leg to body.  Sew on smile. Stuff nose with a little bit of stuffing if needed then attach nose to face.  I sewed the back of the nose onto the face for additional security.


Using the black felt, cut out two tiny black pupils then glue onto the white pom poms.  Glue pom pom eyes to face just above the nose. 

You can either attach Dorothy directly to Elmo’s hand or crochet a long chain to attach Dorothy separately to the key ring. 


Finally, attach key ring to Elmo’s head, I just opened the loop of the key ring chain and attached it to one of the stitches near the crown of his head. 

Et voilà you’re done!  


Check out my other tutorials and check back here for the Cookie Monster pattern! 

Saturday, January 24, 2015

Princess Blankie – Free Crochet Pattern and Tutorial (2)

OK – Part 2!  If you haven’t checked out my tutorial on how to make a Princess Leia Blankie then please do, because the Cinderella and Snow White patterns are pretty much the same except for different colour combinations on the dress and different hair.  

My girl has been watching Cinderella on loop so the first adaptation I’ve planned is a blonde princess with her hair up in a blue dress.  If you make the dress in green and add a pair of wings you’d get Tinkerbell.  


Cinderella Version:
Please check back to the original pattern for full directions as well as explanations of abbreviations.

Head: Make the head as per instructions for Princess Leia.

Dress:
R1 to R5: same as Leia, except use a medium blue yarn.
R6 to R10: same as Leia, use a lighter blue yarn. (or use Sirdar’s Snuggly Pearl DK – they have a sparkly white that would look fab paired with light blue for bodice).
R11 to R12: same as Leia, use white to give Cindy’s dress a white petticoat.

Hair [in yellow]: 
R1: magic ring, 1ch, 6sc into loop, tighten ring, join round with sl st. (6)
R2: 6sc inc (12)
R3: *sc, sc inc* x6 (18)
R4: *2sc, sc inc* x6 (24)
R5: *3sc, sc inc* x6 (30)
R6: *4sc, sc inc* x6 (36)
R7: sc36 (36)
R8: R9: [work fringe] 3ch, skip 1 st from previous row, 8dc, 3ch, skip 1 st from previous row, sl st, 3ch, skip 1 st from prevous row, 4dc, 3ch, skip 1 st from previous row, sl st. [end of fringe]
R9: [work back of head] 2ch, 18dc, turn. (19, counting 2ch as 1 st)
R10: [working on reverse side of hair piece], 2ch, skip 1st, 16dc, 1dc dec. End row and leave a yarn tail at least 20cm long.

* If you’re not familiar with ‘turning’, it just means you flip your work over so you’re working on the reverse side. This allows you to work on Cindy’s fringe before you go onto the back of her head.

Cinderella’s bun [in yellow]: 
R1: magic ring, 1ch, 6sc into loop, tighten ring, join round with sl st. (6)
R2: 6sc inc (12)
R3: *sc, sc inc* x6 (18)
R4: *2sc, sc inc* x6 (24)
R5 – R6: 24sc (24)
R7: *2sc, sc dec* x6 (18), end row and leave yarn tail at least 10 cm long.

Arms [in white and beige] make 2:
R1-R14: same as Leia except in white
R15-R18: same as Leia except in beige.

Making up: 
As per Leia’s instructions, except you should sew the bun on top of Cindy’s head, and tie a blue ribbon on it for super cuteness.


Snow White Version: 
Again, please check back to the Leia pattern for full instructions


Head: same as Leia.

Dress:
R1 to R5: same as Leia, except use a medium blue yarn.
R6 to R12: same as Leia, use yellow yarn.

Hair [in dark brown]: 
R1: magic ring, 1ch, 6sc into loop, tighten ring, join round with sl st. (6)
R2: 6sc inc (12)
R3: *sc, sc inc* x6 (18)
R4: *2sc, sc inc* x6 (24)
R5: *3sc, sc inc* x6 (30)
R6: *4sc, sc inc* x6 (36)
R7: *5sc, sc inc* x6 (42)
R8: 42sc (42)
R9: [work fringe] 3ch, skip 1 st from previous row, 4dc, 3ch, skip 1 st from previous row, sl st, 3ch, skip 1 st from prevous row, 4dtc, 3ch, skip 1 st from previous row, sl st. [end of fringe]
R10: [work back of head] 2ch, 28dc, turn. (23, counting 2ch as 1 st)
R11: [working on reverse side of hair piece], 2ch, 28dc, dc inc, turn. (21)
R12: [now on front side], 2ch, 28dc, dc inc, turn.
R13: [now on reverse side again], 2ch, 29dc, dc inc. End row and leave a yarn tail at least 20cm long.
Headband [in red]: 
R1: 14ch (14)
R2: starting from 2nd ch from hook, 13sc. End and leave a tail at least 8cm long. (13)

Bow [in red]: 
R1: 11ch (11)
R2: starting from 2nd ch from hook, 10sc, turn. (10)
R3: ch, 10sc, turn. (10)
R4: ch, 10sc. (10) End and leave a yarn tail 10cm long.
Using the yarn tail, weave it to the middle of the finished piece, sew the top and bottom edges together, wrap yarn around centre about 3 times, then sew bow onto headband.

Arms [in blue and beige] make 2:
R1-R14: same as Leia except in beige
R15-R18: same as Leia except in blue.
Add pretty details by sewing straight lines on the sleeves with red yarn.

Making up: 
As per Leia’s instructions, except you should sew the headband (which already has the bow sewn on it), onto the top of Snowy’s head.  You can also sew a dark blue line down Snowy’s front to mimic a seam.

There you go!  Have fun adapting!  And if you’ve any cool ideas on how to do other princesses – tips and pics in the comments would be highly welcome!

Daisy in the Corner Crochet Cushion - link to video tutorial

Can you spot the cat? :)  Mercerized cotton is the BEST yarn for cushions.  That added sheen and protection means the stitches do not pile o...